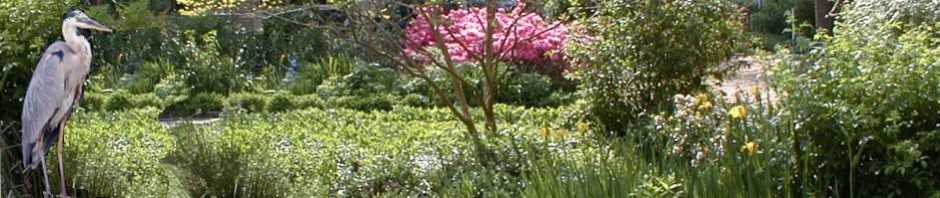
It’s a lovely day in June, the temps are about 75 or 80. Plants in the garden still glow from moderate temperatures and spring rains. New growth is fresh and lush.
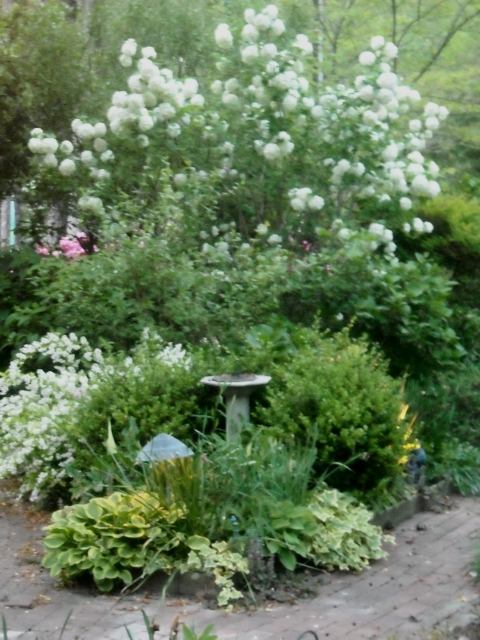
Pictured: Snowball viburnum, deutzia ‘Chardonnay Pearls’ in white, Korean boxwood and hydrangea yet to bloom are all good candidates for semi-hardwood cuttings
We’ve checked the rooting media by squeezing a handful. No water drips from our hands. The media holds together and feels like a wrung-out sponge. We tamp the rooting media gently gently gently into beds or pots, just enough to make good contact between the media and future cuttings.
We mix our hormone as directed for dipping semi-hardwood cuttings. A small quantity is all we will need: a tablespoon of hormone to 3 tablespoons of water. This small amount is good for a couple of hundred cuttings.
Shelf life of undiluted hormone is estimated in years if kept refrigerated, but directions invariably call for diluted hormone to be replaced after a day or so of use.
We usually extend that “day” several times, hence the use of a jar with a cover instead of a disposable dixie cup. Nobody ever told us why mixed hormone solution should be disposed of after a few hours use (contamination? evaporation?), and we have suffered no apparent consequences for breaking the rules.)

From one healthy stem come many cuttings. Note trimmed leaves
We work with one plant at a time, cutting long stems, often doing quick, light pruning while we are about it and collecting a wide choice of candidates.
Stems in hand, we move immediately into the shade and begin sorting and clipping branches into more reasonable lengths for handling.We discard scraggly, webby, and bottom branches. We want branches that have been basking in sunshine or dappled shade.
We work as quickly as we can, brooking no interruptions. Otherwise, we’d have to wrap stems in wet paper towel and pop a plastic bag over them. If leaves wilt (a rare occurrence) we give the plants a cool-water bath in the kitchen sink. This may work, but odds of rooting success go down.

Rose of Sharon cuttings prepared except for removal of flower buds. Stems without flower buds are preferred, but we couldn’t find any!
We take a combination of tip cuttings (unless tips are so immature they look like they are will wilt quickly) and cuttings all along a stem. Wood will be heavier and more mature as we reach the base of the stem. This variety of cuttings gives us a range of ripeness to experiment with.
We use the 10-to-1 rule. If we want one plant, we take ten cuttings. Happily, sometimes we are overwhelmed with new plants. More likely, success is modest.
If cuttings from a particular plant go bust, while those from other plants root well, we can be pretty sure our timing was off and try again with harder or softer wood.

Some of these confederate jasmine cuttings still need leaves removed. Note sap oozing from cut stem. Bleeding can be reduced by making a second cut a minute later
Using our dedicated pruners, we make clean cuts at angles to the stem for greatest exposure to rooting hormones during the dip.
Each cutting is usually about 4 inches long and has at least two, up to four or six leaves. We remove lower leaves, also any flower buds or flowers. If leaves tend to tear when we pinch them off, we use pruners to remove them.
We try to avoid choosing stems with mature flowers — their energy/hormones have gone to supporting bloom – unless we can find no stems without blooms (happy day in the garden!). In such instances we remove blooms from the cuttings and hope.
Larger cuttings will start larger plants but may wilt before they can root. Heavy stems often root more successfully than thin, but there are exceptions. That’s why we use the shotgun approach.

A compound leaf consists of a long petiole with several leaflets attached. Two of these leaves and a portion of the stem should be taken. Leaves can be cut back
If leaves are large (hydrangea, for example), we trim half or more away to minimize wilting and maximize space in the bed. Smaller leaves may also get some trimming, as do leaflets on stems with compound leaves.
It is a judgment call. Leaves provide food for new roots, but if they wilt quickly, they can’t do their job. Sometimes leave wilt immediately after sticking but recover a day or so later.
A compound leaf consists of several leaflets, which can be mistaken for a potential stem cutting. Examples of plants with compound leaves are roses, wisteria, poison ivy, and sumac. Cuttings should include at least two compound leaves on a stem, trimmed back if necessary.
Finally, we check the undersides of leaves for insects, eggs, and disease. Leaves don’t have to be perfect, but they should be healthy and insect-free. Early in the season it’s easy to find perfect leaves.
As summer advances, leaves show more battle scars from opportunistic varmints. We have never had a problem with insects or disease in our beds. If we have a shortage of material for cuttings, we use second-hand stems and give them a thorough rinsing.

These cuttings are ready to be bundled for dipping into the hormone mixture
Nodes. Nodes. Nodes. A node is a joint on a stem from which a leaf or bud may grow. Many years ago we read that roots grow from nodes and two nodes are necessary for proper rooting, one node with leaves and one node without.
In the case of hydrangeas and other plants, leaves sometimes grow so far apart along the stem that cuttings with two nodes would be much too large.
Turns out nodes on cuttings don’t seem to matter. Roots on our cuttings don’t seem to care about nodes. They may grow anywhere along the stem or from the bottom of the cutting, usually not from a node. And nobody ever explained why nodes were important. So we forget about them. We take cuttings that are the proper size, with or without nodes.

Example of wounded cutting ready to be dipped into hormone solution
This is probably a good time to bring up the subject of wounding a cutting to promote root growth. Some propagators consider removing lower leaves to be a form of wounding. Others remove a thin sliver of wood from the stem of a plant that is difficult to root.
We know growers who routinely wound cuttings. We don’t because we don’t seek out plants that are stubborn rooters, and wounding has never consistently mattered to rooting in our beds. To each his own theory and practice.
We dip cuttings into the hormone mix for only a second, let them air dry for a minute or so before sticking. Bundling cuttings speeds the process because we can dip several at a time.

Labels with plant names and dates tell their own story. After three weeks, these cuttings still look good
Before we stick cuttings we prepare a label with name and date taken. We stick cuttings into the media deep enough for good support, maybe half an inch to an inch. This keeps them well away from the bottom of the container where soil may be too moist. We leave enough space around cuttings so leaves do not touch, and we firm media gently around them.
If stems of herbaceous and softwood cuttings can’t penetrate the media easily, we poke holes with a pencil. We are especially careful to firm media gently around these cuttings because we don’t want any air pockets in the soil.
We water lightly to settle the soil around the cuttings, then check to see if any cuttings need resetting after the sprinkling.

Spritzing is a low-tech way of adding humidity. Aim nozzle up to spray to create a light mist
We drop the plastic over our bed and secure it with a couple of bricks. If there is condensation on the tent, we can be pretty sure humidity is high. In a hoop house, excess humidity condenses on the plastic and rolls down the sides to land outside the bed.
Now it’s time for tough love. We’ve done our part, however imperfect. It’s time for the hopeful clones to do theirs. The only attention they might need is an occasional spritz if the bed lacks humidity or soil seems dry.
Spritzing should be aimed up toward the tent to allow moisture to fall as rain. In hot weather we open the bed to remove trapped heat and check for casualties before mold sets in.
This year we filled two beds with cuttings in early June. Two weeks later we left town for ten days during a heat wave. When we checked (by flashlight the night we returned home), media in both beds was still nice and moist.
Some of the cuttings in Bob’s experimental bed in deep shade actually looked better than they did before we left and most seemed to be rooting nicely. Cuttings in the bed I use, my old favorite because it stays evenly moist, were also in good condition and were rooting, despite spending the hottest part of the day in full sun. A cloak of shade cloth gives them some relief.

If we can’t stick cuttings immediately we wrap base of stems in moist paper towel and pack the entire batch in a plastic bag to store in a cooler with ice
Sometimes, on summer visits, I raid daughter Susan’s garden in New Hampshire for samples of her interesting plants.
I take a few long stems from each plant and wrap them in liberally dampened paper towels and saran wrap or plastic bags. To slow down plant processes I put them in a cooler with an ice pack for travel and keep them there till I am ready to take cuttings. I’ve had phenomenal success; I’ve had dismal failures.
The successes happen when temperatures are reasonable. Pruning stems during stressful 90 plus temps, cooling them down to 50 degrees, then putting them in beds with 90 plus temps truly test a plant’s mettle. Refrigerating prospective cuttings at 40 degrees is even more dire. But I still keep trying. Chalk it up to one grand experiment.

Uh oh. Gray mold (enlarged here), otherwise known as botrytis, can infect a bed if failed cuttings are not removed quickly. Photo from Success with Cuttings by Chis and Valerie Wheeler
It usually takes a month to two months or longer, less time for softwood and herbaceous cuttings, and less time if bottom heat is used, for cuttings to be ready for potting. If leaves fall off, but stems look healthy and there is resistance to a gentle tug, the leafless waifs get a reprieve from yanking.
We have occasionally fertilized rooted cuttings with a weak solution of fertilizer while they are still in the bed. This is tricky because plants under white plastic with shade cloth are not receiving much light.
Sometimes the fertilizer stimulates picture-perfect new growth, sometimes nothing happens, or growth that is stimulated is pale and leggy. Again, it’s an experiment.
We gardeners are ever hopeful for one hundred percent success. On the wild off-chance that an occasional cutting of yours might languish, here in a nutshell are some suggestions for troubleshooting:

Success! Our pink and red oleanders came from a neighbor’s plants. They remind us of our friends whenever they bloom
Rooting medium too wet, too dry, too cold
Air conditions too hot, too cool, too dry, too moist
Parent plant too thirsty, too stressed, too old
Stem cutting too soft, too hard, too small, too weak
Hormone mixture too strong, too weak, too old
Pruners too dull, too chipped, too gunky
As we’ve said before and will say again, propagation for fun is art, not science, unless you are a professional grower. We take the curve balls as they come. We forget about the strike-outs. We celebrate the hits, and we cheer the occasional home run.
For more on propagation with stem cuttings, see our June 2012 post,
Plants for Pennies and check out the links below:
Propagation: Stem Cuttings Pamper your Pruners Using Hormones
Soilless Media? Small Pots or Large Beds for Cuttings? Choosing Candidates

very interesting subject , great post.