The Gang of Eight Takes a Big Hit
We didn’t worry about the camellias after Hurricane Isabel sailed through our garden in eastern North Carolina on September 18, 2003 with high winds, tornadoes, and heavy rain. We were more concerned with setting the garden to rights.
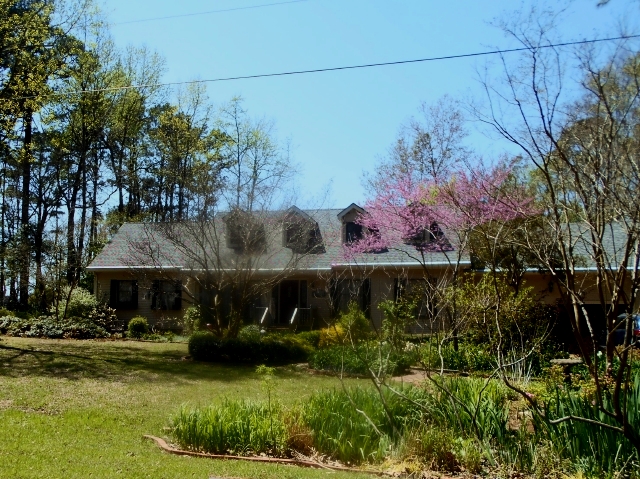
To give you an idea of the losses to the pines nestled behind our house, here are before and after pictures.
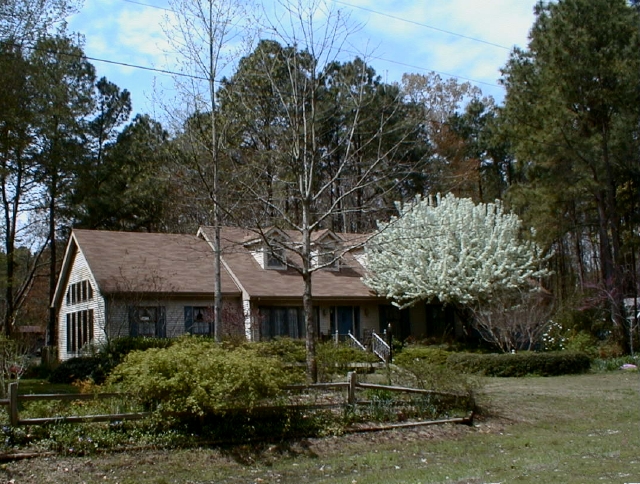
Before the Storm
After the Storm
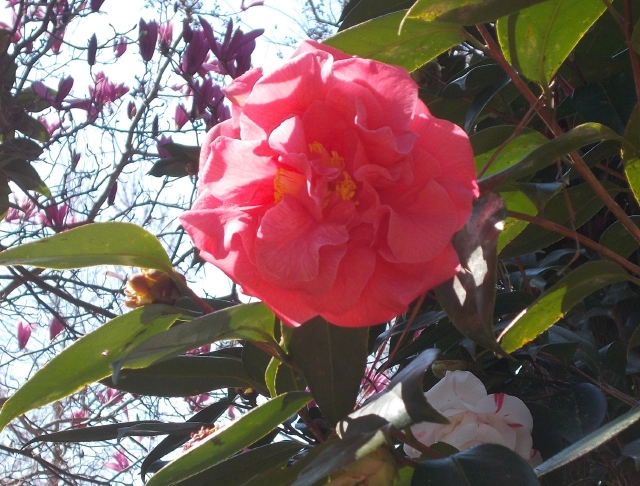
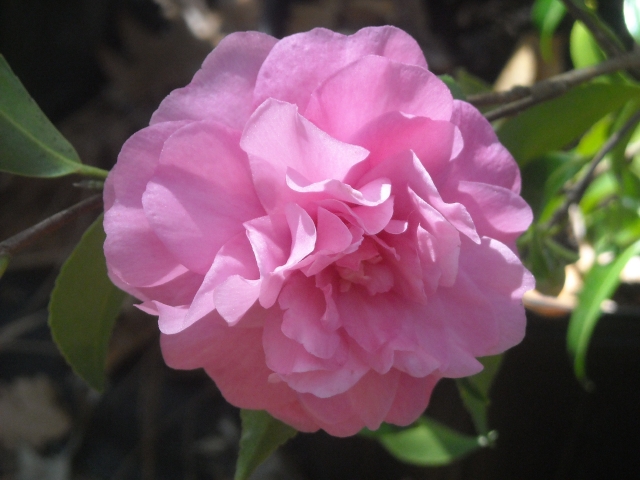
Among the messes and the losses, the camellias, now coming of age, glowing with the blush of debutantes, weathered the storm with barely a broken twig.
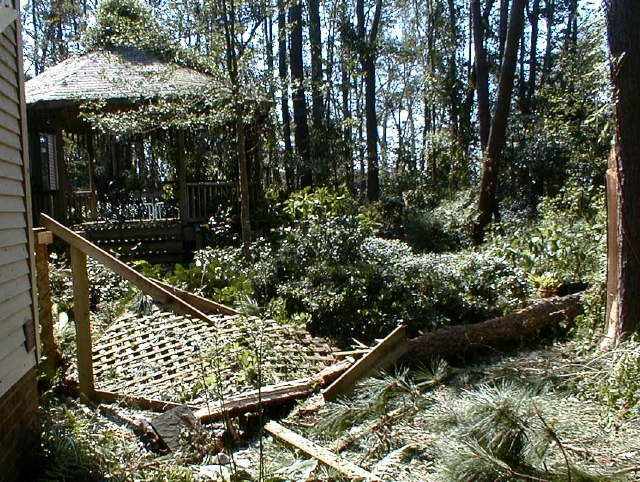
There is a camellia under the lattice fence
Even the one camellia toppled by flying lattice bounded back like a toy soldier after we rescued it.
Survivors of the Storm, But. . .
They had held their heads up in wicked breezes.
They had beamed in the face of destruction. Of course they would survive and bloom.
It had never occurred to us to take pictures of the bed, even after the storm.
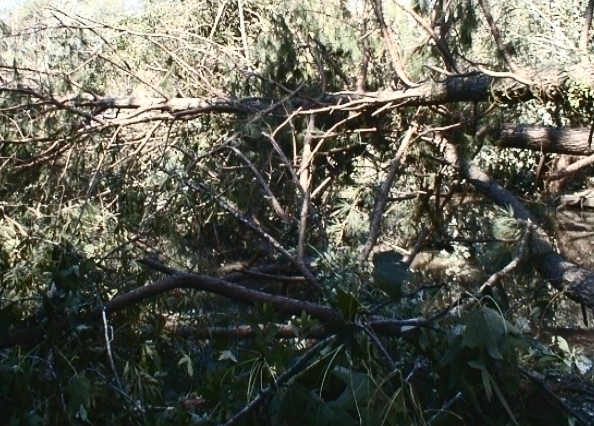
No, this picture is not turned on its side, the trees in the garden are topsy turvy
After all, they had survived.
We could enjoy them as before.
A year or so after the storm, they had become collateral damage.
Why? Had we understood what was happening we might have rescued them.
But it took time to put the clues together.
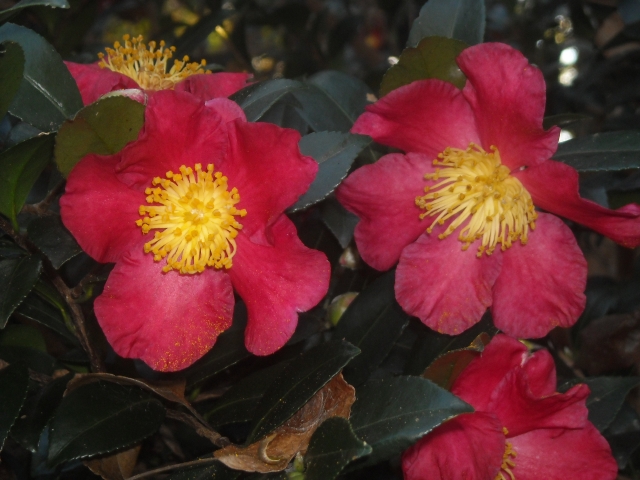
A survivor in the midst of chaos, C. sasanqua ‘Yuletide.’ Though slow to begin blooming when first planted, it is a brilliant, profuse bloomer during the holidays
So many trees had caved to the wind, we were overwhelmed with sorting tangles and could not focus on plants that seemed to be taking care of themselves.
We ignored them.
In an instant the garden had changed from an inviting shady nook to a hot sahara.
That, we soon learned, was more an annoyance to us than to the plants. The root cause of the destruction lay underground.
A favorite japonica camellia planted early on, ‘Berenice Boddy,’ managed to survive
We had almost forgotten we lived in a swamp. Before the storm, large pine trees had sucked up rainwater through their roots.
In fact, our soil often seemed positively dry in summer.
But the pines had fallen and their roots were gone. Millions of straws sucking up water were missing. Our plants suddenly needed boots, but there were no boots around.
The camellias stopped growing. Twigs died back. Leaves looked gray and wilted.
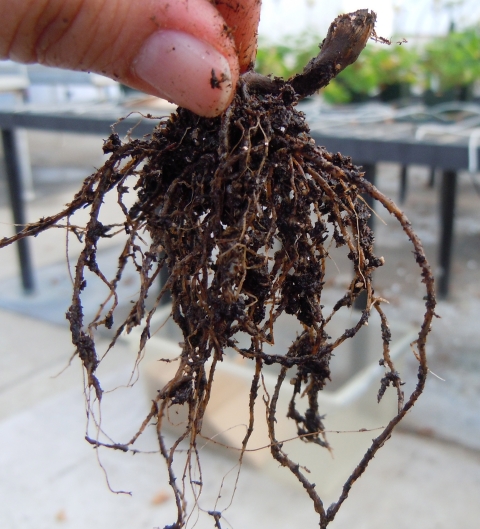
Not a pretty picture of suffering strawberry plant roots taken by Luisa Santamaria. They’re probably mushy, too
Root rot Attacks
It’s a funny thing about root rot. The leaves wilt and you think the plant needs water, so you water it, and the leaves don’t stop wilting, and maybe they turn brown or yellow, so you put more water on the plant, thinking you are doing a good deed.
But your good deeds are backfiring. The plant does not perk up. What’s going on?
The plant is drowning. Roots are begging not for water but for air. What confounds things is that wet conditions can exist indefinitely without severely damaging a plant, so symptoms are often ignored.
C. japonica ‘Simeon’ was planted early on in a drier area and survived, though it looked like a sickly, gangly kid for years until it took off to great heights and now provides air layers for new plants
When soil temperatures and humidity and moisture combine to create the perfect storm, root rot fungus revs up and attacks.
Its spores have flown in with the wind or hitched rides on insects and garden tools and transplants. It can fiddle for years, then strike up a tune when you least expect it.
Or it can wreak havoc in a bed with lightning speed, and you never quite understand what ailed that plant.
Cutting back to undamaged growth is only cosmetic. The plant looks healthy for a while until the loss of functioning roots catches up to top growth.
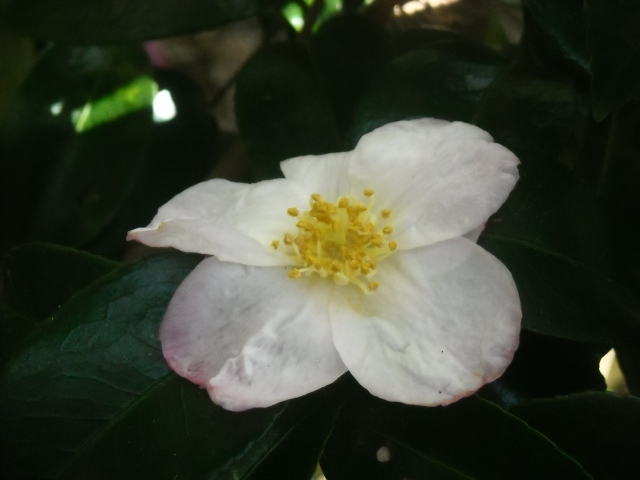
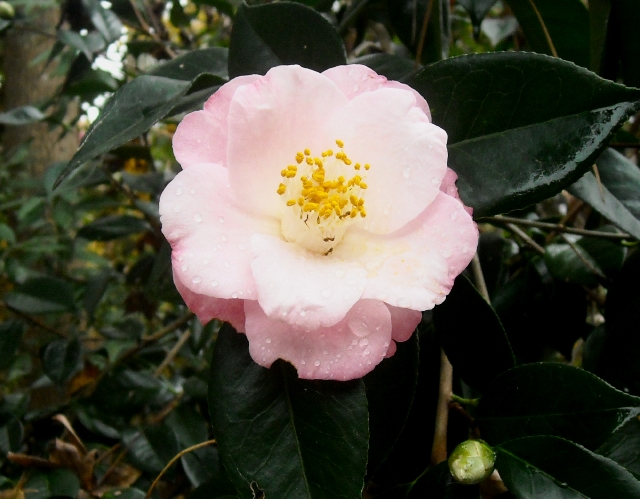
C. sasanqua ‘Appleblossom’, which we love for its delicate flowers, is astorm survivor that had been planted in upland soil
Biting the bullet and pulling out the plant and throwing it in the trash (not the compost pile) is the only safe course left.
Usually, by the time we can bear to pull a plant, root rot has already killed off most of its roots, leaving a dead and brown mass, which no doubt is leaving spores for another round of attack. Best practice, alas, is to act quickly and cut losses.
Sterilizing soil or using fungicides is a little like holding back the ocean with a finger in a crumbling dike.
Neither is worth the time, trouble or expense, or the exposure to chemicals.
Replacing soil in a bed is a gargantuan task and there’s no guarantee. Adding compost will loosen the soil and adds nutrients. Digging in amendments like vermiculite and perlite will help aerate the soil.
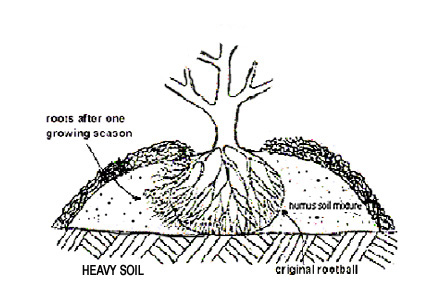
Diagram from American Rhododendron Society on how to plant in heavy soil. Plant sits on solid soil at ground level and amended soil is mounded around it
Replanting with resistant plants will succeed, but only if you know what plants are resistant. Worth a try.
We’ve learned from experience that many shrubs will work but perennials are more susceptible. We still do a lot of hoping and we try to be vigilant about observing signs of ill health.
All replacements should be planted high in shallow holes with rough, fluted sides (see Siting and Planting for pictures of a hand-dug hole). Dig wide, not deep is the motto. Plants should sit on firm ground to avoid sinking.
Soil should be mounded up to the base of the plant so water runs away and not toward the plant. We use this method of planting to eliminate the dreaded “soup-bowl” saturation around all woody and herbaceous plants. The soup bowl is a surefire sentence to root rot. Mulch should be kept away from stems.

The loner, C. sasanqua ‘Shoa no Sakae’
What We Did Then: Nothing!
Today we tell the world what we should have done. Back then we didn’t know that anything even needed doing, except watering, which we did without connecting the too-wet soil in the bed with any problems.
Early on, before any symptoms showed, we should have checked moisture around the plants and pulled camellias and their neighbors, pittosporum. We should have potted them and held them for replanting in a year or so in areas that were better drained.
We were so distracted by the colossal damage above ground, we paid no attention to the colossal changes that were occurring silently underground.
Ironically, we had areas that drained quite well. It took us a while to realize that these first camellias were planted in a sort of gentle, almost imperceptible, swale. The level of our property rises several feet as you walk from its center toward the northern or southern edges. Our house and the camellia bed were centered on the lowest point in the lot. Drainage flowed from the edges of our property toward the center.
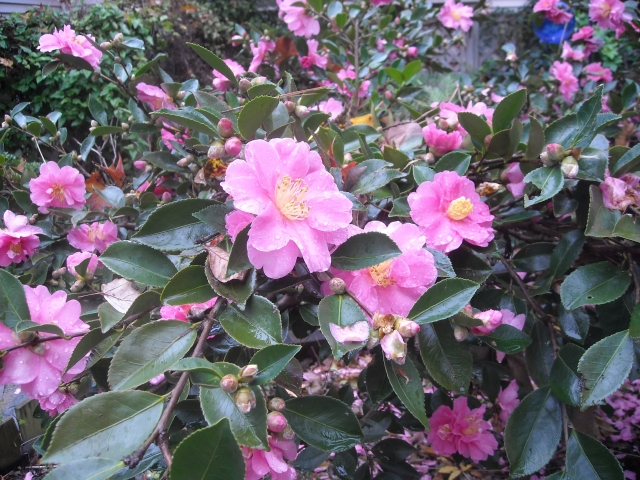
The survivor, C. sasanqua ‘Shoa no Sakae’ blooms spectacularly for a solid two months in late fall
By the time we figured out what was going on, the camellias and nearby pittosporum were beyond hope.
One by one we pulled them. The native holly still stood sentinel, though its sad-looking leaves mourned the loss of its neighbor, the pine that had kindly given shade and moderated moisture.
One lone camellia showed promise, so we gave it a second chance.
Privately we thought it would be gone the following year, fading in direct summer sun or drowning in heavy rains.

Louisiana iris partnering with camellia, but it’s working so far
We limbed it up into a low, spreading tree that creates nice shade for hosta in summer that, in a turn of events we did not expect, provide salad greens for deer and rabbits.
Hoping to suck excess water from the bed, we planted water-loving plants near the lone camellia: Louisiana iris, deciduous holly, native swamp dogwood, joepyeweed, New York ironweed, and, by default, clethra, a plant that can tolerate excess moisture.
Strange bedfellows for a camellia, but they all seem to get along well and thrive.
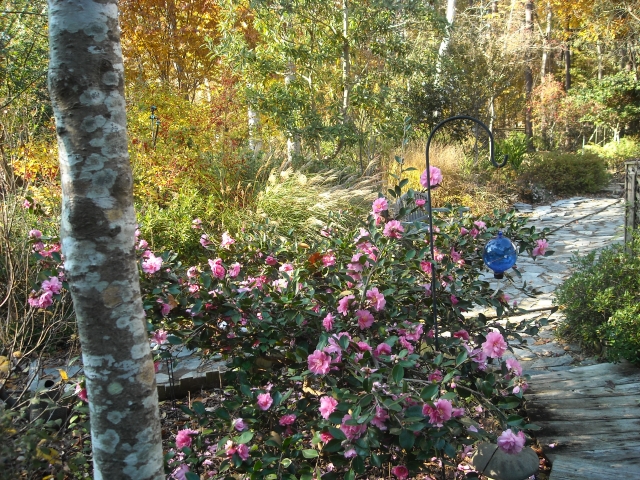
A long view of Shoa in our fall garden
Ten years later, that camellia, a sasanqua called ‘Shoa no Sakae,’ was consistently producing hundreds of flowers every year, giving us spectacular bloom for two or more months until hard freezes slowed it down.
Even so, snow-frosted buds will open on balmy winter days. When blossoms shatter and petals fall, the ground becomes a swirl of pink.
On rainy days, there are still puddles beneath the plant. A slight slope, almost imperceptible, has developed in the bed over time, so the soil around the camellia constantly drains, if ever so slowly.
We have added, occasionally and sparingly, composted cotton dirt from the local gin to insure the drainage continues. Miserly amounts of soil added around the camellia to create a raised “island” increase drainage and do not seem to smother surface camellia roots.
That trickling just may keep the fungus at bay. We have found that beds with no slope and little flow of water promote the fungus that causes root rot.
We must be honest. During the past three or four colossally wet years, the camellia has lost branches and even one trunk, though bloom is still heavy and the low tree still looks attractive. A test of time is taking place, and we hope the camellia holds out.
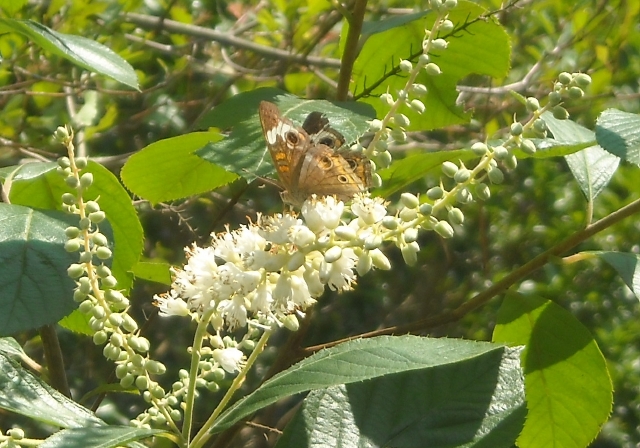
A buckeye sips nectar from woolly summersweet, or clethra, originally heeled in near the Shoa. It prospered in moist ground, so we gave it permanent berth. Today it provides summer interest
Why is that camellia surviving when seven others failed? Its companion plants today are slackers at sucking up water compared to the roots of the original benevolent pines around it.
Sasanquas may be less susceptible to root rot than are japonicas, and they can tolerate more sun than japonicas. The Shoa was the only sasanqua in our Gang of Eight.
Gardener’s Aside: Most camellia hybrids probably react to wet feet more like japonicas than sasanquas.
And sasanquas have their limits, too, as we discovered a decade later.
History repeats itself. . .
. . .in ways we can’t always predict.
Oh dear.
Fast forward to 2016. It’s been a rainy rainy two years. We’ve just cut down an aging crabapple in front of the house. During the hurricane it had saved our roof by intercepting falling pines, so we felt a special fondness for it.
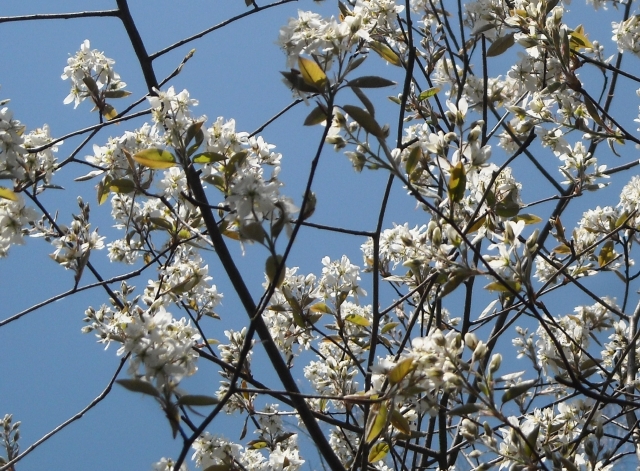
Reaching for the sky, not quite in full bloom
Every spring since then, its blooms had kicked up their heels and danced under the sky.
Unfortunately, the tree itself had become a sad sack with water sprouts and unhealthy branches that buzzed the house.
After we cut it down, we learned that it had been a benevolent provider.
Years prior to Isabel, just for fun, we had taken cuttings of Shoa that readily rooted. We never found a spot for them. They were orphans kicking around in pots, too good to toss.
Our odds-defying surviving Shoa gave us a new respect for these potted offspring. We planted the youngsters en masse around the crabapple. Happy to find a home, they rewarded us by jumping out of the ground. For almost a decade under the light shade of the crabapple they grew strong and bloomed.
Bright camellia blossoms in drier soil reaching for the sky today
But the crabapple was giving more than shade. A healthy network of its roots was moderating water supply and providing almost perfect drainage to the bed.
Without the crabapple, shade was missing and the camellias sat in puddles after a rain.
They, too, were inadvertently planted in that swale in the middle of our property — this time in front of the house, instead of behind it.
To add to their woes, we found water from an adjacent raised bed draining toward their bed. We had created a boots-stuck-in-the-mud swamp. Not promising.
We began some half-hearted experiments to manage the water, but in 2017 we had to come to terms with the losses. We had begun with seven shoas. As in Agatha Christie’s And Then There Were None, one by one the plants failed.
After they were gone and the bed was cleaned out, we incorporated more than a ton of organic “cotton dirt” (available locally from the gin) and another ton of all purpose builder’s sand into the bed. We’ve switched to azaleas and spireas, even Louisiana iris! Ya gotta take your losses and adapt. Time will give us a picture of survivors or limpers.
And the garden goes on. But we never know where the next steps will take us.
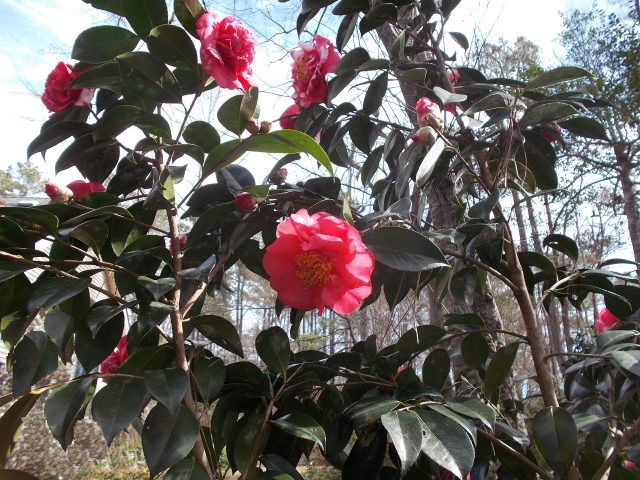
C. sasanqua ‘Chansonette,’ three lucky plants that, in the end, won the storm lottery. Mistakenly, we planted them in the property’s moist swale under the shade of pines. When we saw they were not thriving, we replanted them in the dry and shady north side of the garden. They did nothing for years (though they did not die). Despite direct hits during Isabel, they later became huge blooming machines under open, sunny skies.
Camellias in our Garden Siting and Planting Camellias
Pruning and Fertilizing our Camellias Insects and Diseases of Camellias
Camellias Become Collateral Storm Damage Camellia Recovery and Care
Air Layering Camellias Wildlife and Camellias
Choosing Camellias Landscaping with Camellias Companions for Camellias

Sharing your experiences is such valuable information for others. Thank you!
I live in North Central Florida and am involved in the Ocala Camellia Society. I was searching for information about post-hurricane camellia care to present at our next meeting and came across your blog. You identified issues that I had not thought of. Can you add any more advice for me to share with the members of our group? Hurricane Irma left some of us with trees downed on or near our camellias, flooding, and/or uprooting. I was planning a brief talk on things to do to save damaged or stressed camellias. I’m glad I found your site – I look forward to reading all your posts about camellias especially.
Would you mind if I shared a link on our facebook page? (Ocala Camellia Society)
I am so sorry to hear about the damage to your camellias. There is too much to talk about in this space, so I have sent a lengthy reply directly to you. If you are checking back to this site, and have not received it, let me know and I will post the full comment. Good luck with your camellias.
Do you grow any camellias from seeds? My seeding from last year grew well and we looking great. Then one at a time wilted and died I am pretty sure from root rot even though I had them in a very well draining soil mix. Are young seedlings more susceptible to the problem? My larger air layed plants are not having the issue.
Hi Chris — I am sorry about your losses. It can be so frustrating watching plants coming along and then lose them one by one. We do not grow camellias from seed, but we do have camellias seeding in around the yard and they seem to be pretty healthy, but they are usually growing in soil that is drier than I would choose for them. I think you are right, the soil was probably too moist. If we pot air layers in a mix that is not sharp-draining they will rot and camellias in pots seem happy to be on the dry side, also. Poor soil will slow a camellia’s growth, stunt them, but wet soil is a sure camellia-slayer for us, except for one that keeps thriving and we can’t figure out how. Hope this helps.
Thanks for the reply. I have about 75 that should be sprouting soon. I hope I have better success with these. I have decided on using some occasional daconil treatment as well as really watching the water. Love the sight keep up the good work.
I am so delighted to hear about your soon-to-sprout camellia seeds. I had no idea you were working with so many. Would love to know your techniques and what you’ve learned. If you have a chance, when you see how these 75 are doing, could you let me know a few of your secrets, and I will publish them under camellia propagation, or even start a new post about camellias from seed. Very best of luck to you.