Our Gang of Eight Gets Buzzed and There’s War
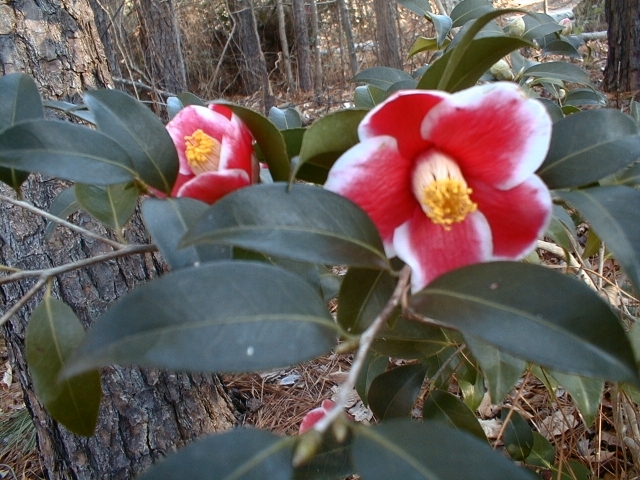
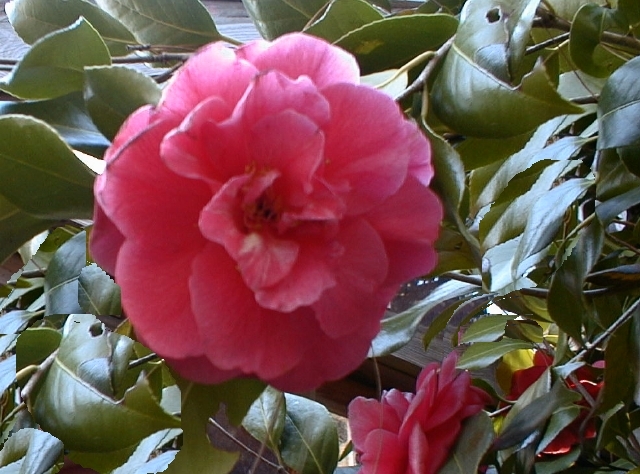
Camellias are among the most carefree plants in our garden. Dappled shade, shelter from wind, good drainage, organic soil and a couple of inches of mulch usually keep them happy. Truly!
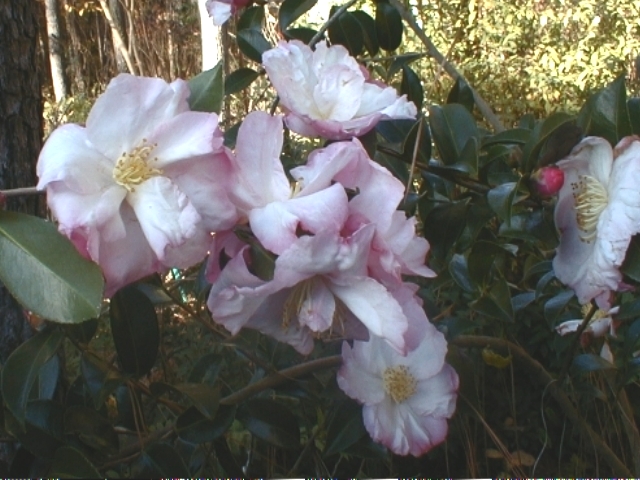
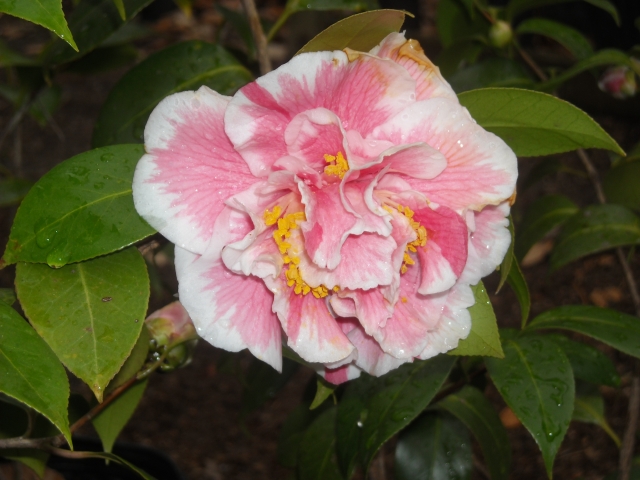
In fifteen years this sasanqua camellia ‘Yuletide’ has thrived with no need for special care
But sometimes gangs of sneaky culprits stake out territories and we have to go on patrol. We do this periodically to try to stay ahead of the scams these characters hatch. It’s actually a pleasant interlude in the garden, wandering from one camellia to another and congratulating ourselves (mostly) on the lovely plants we’ve raised.
Here we are profiling five rogues, mug shots and all, so you will have no trouble recognizing the trouble caused by these shifty characters and keeping them in their place — out of the garden.
Tea Scale
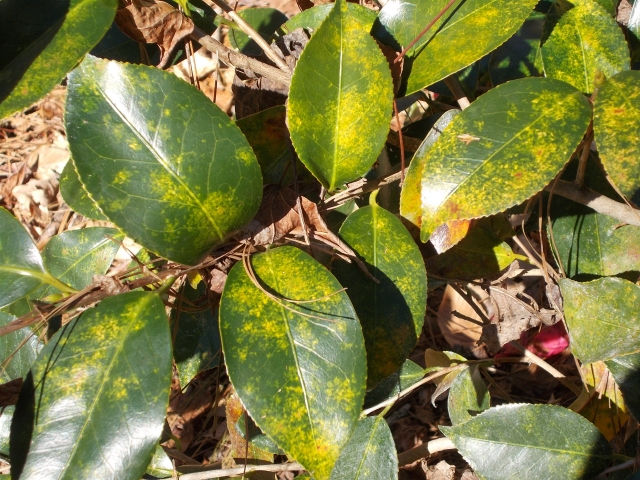
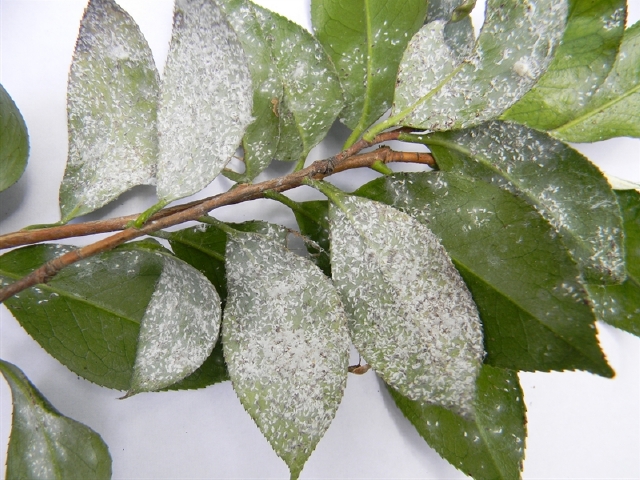
Typical example of tea scale on upper leaf surface
The most aggressive gang member: tea scale. It’s the Al Capone, or more appropriately, the Bugsy Moran of the Insect Gang. Tea scale began to invade territory claimed by our Gang of Eight a few years after the bed was established.
Clues were ugly yellow blotches on the upper surfaces of leaves.
We turned leaves over and spotted the gangstas themselves. Tiny, tough brown females and webby-looking males. The females do the eating, the males do the mating.
Those rough brown dots you see and feel are females with armored scales, immoveable, voracious. They protect their eggs under that armor. When the eggs hatch, the young move about seeking a new home. First hatching is usually in spring when weather gets warm, but there can be several hatchings in a season. Once a female pierces a leaf and begins to suck its juices, she is anchored in place.
They are the culprits that create the yellow blotches. The males, with no mouthparts, spend their days chasing pheromones to find mates.
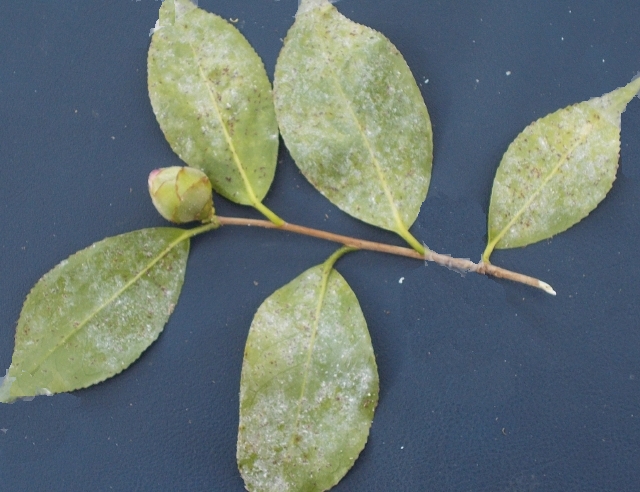
Underside of leaf infected by tea scale, individual insects barely visible
The males are covered with waxy white scales and give the leaf a webby or cottony look. Often, they can be rubbed off a leaf.
Now, I’m sure you don’t much care about the love life of a tea scale, but I mention all this because the best time to get the female is after she has hatched and still moving about to find a permanent home. Once she is armored in place, she is more difficult to eradicate.
In the beginning we tried to control tea scale by plucking damaged leaves.
But they overwhelmed us. The more we plucked the more we found.
We lost that skirmish faster than a hare jumps a brier bush.
So we mustered the botanical tommy gun: horticultural oil spray.
It’s been used in fields and gardens for almost a century to kill insect pests. Today, highly refined forms are sold that can be used in a wide range of temperatures, though we made a personal decision to limit our use to nice days when temperatures are in the range of 50 to 75 degrees. And that happens to be when most insects are active.
Bad bad infestation (America Camellia Society)
Horticultural oil works by smothering insects. It clogs their spiracles, or breathing holes.
No chemicals involved.
No concerns about insect-immunity developing.
It’s the safest remedy we know.
We’ve used Bonide All Seasons Horticultural Spray for Organic Gardening, but there are other fine products on the market.
C. sasanqua ‘Apple Blossom’, fall bloomer, carefree, rarely affected by tea scale
By the time spring flowering has peaked we begin to spray, usually a balmy day in late March or early April.
We avoid spraying during dry spells when plants are stressed, often the case in summer. Insects are probably not as active during dry spells, either. Our most severe infestations have occurred during rainy summers.
Horticultural oil does not discriminate. It affects every insect it comes in contact with.
We spray only in the evening (early morning is good, too, but we are late risers). When the sun is lowering in the sky, a camellia’s defense team, beneficial insects like wasps, lady beetles, lacewing, and spiders are rarely about. They prefer feeding during a high-noon sun.
We mix the oil with water according to directions and spray the entire plant, its interior and most especially the undersides of leaves. The plant is almost dripping when we are done.
We have always used one of those two-gallon pump sprayers, which are fine if you only have a few camellias to care for. Since our garden features almost a hundred camellias, we now use a a battery-operated backpack sprayer that requires no pumping.
Prune before spraying. If a plant is too crowded with crossing and weak branches, pruning before spraying will open it up and make it easier to target insects.
With proper pruning, air circulates more freely and young insects may simply be cast away on breezes to a neighbor’s garden. (See Pruning and Fertilizing Camellias) for more details.
Twenty-year-old C. japonica ‘Betty Sheffield’ has grown too tall to spray completely, is rarely affected by scale at these heights. However, scale may be present on lower branches where circulation is not as free
Bob, who is our camellia steward, sprays to a height he can reach, which is fine, because the tops of our old camellias don’t seem to be bothered by scale.
Perhaps the breezes up there are too rough for young crawlers searching for permanent sipping territories.
Dicey-looking plants, the young, the weak, the small, the newly planted, or the forgotten, may be more susceptible and need extra attention.
In these cases, Bob may spray a second time in a week or two. For plants with mild infestations, one spraying is usually enough.
Serious infestations may require spraying every couple of weeks throughout the growing season, and it can take a year or more before plants fully recover.
When leaves lose the webby look, you know the infestation is on the way out. The males are gone. The female can’t do much with her eggs without the male. Damaged leaves will fall, and one day, imperceptibly, healthy shiny new leaves will have replaced them.
As we’ve said, we try to inspect plants regularly to catch problems early, but sometimes we miss. One plus: With regular monitoring, we soon learn which plants might need help and which are rarely bothered.
C. sasanqua ‘Autumn Delight, fall bloomer, cold hardy and free from problems
Sasanquas (fall bloomers) seem to be less affected by tea scale, though prolonged wet weather may promote mild attacks.
Happily, as camellias age, if they are healthy and properly sited (weather cooperating), tea scale can become only an occasional blip in the life of a plant.
Some growers spray like clockwork three times a year, even when plants have no symptoms, with about two months between treatments.
This schedule catches multiple scale broods, but it is a lot of work and maybe not so good for the environment.
Another carefree camellia, C. japonica ‘Tama no Ura’ with a striking picotee edge
Gardener’s Aside: As we’ve said, checking on our camellias is not a chore for us.
We like to look for new blooms, new buds, healthy new growth.
I’s a time to reconnoiter life in the garden, a time for observing the growth of a camellia, its form and shape, for each camellia is an individual.
It’s a time when we can take delight, even pride, in our camellias.
Many of them began life in our garden as toddlers.

Some stores refuse to carry these products, but many nursery plants are treated with neonicotinoids to keep them looking good for purchasers
Second Gardener’s Aside. A powerful class of chemicals is on the market today for routine use on insects.
Neonicontinoids, systemic insecticides that invade the entire plant — roots, leaves, flowers, even pollen and nectar. They persist for a long time in plants and soil.
Beekeepers and environmentalists are working to ban their use. We do not use these products, and we don’t recommend them, though they seem to dominate shelves in nurseries .
You have to make an effort to look for kinder products like horticultural oil, as they can be marginalized in product displays. They are readily available online.
Gardener’s Aside: Neem Oil, a vegetable oil derived from seeds of the Neem Tree long used in India to cure ailments, can also be sprayed on camellias. Like horticultural oil which is a highly refined oil from petroleum products, it kills insects by suffocating them on direct contact.
There is a bonus to using Neem Oil. In its arsenal it has a chemical, azadirachtin, that is systemic (permeates the entire plant) and attacks insects not directly sprayed. It causes insects to stop eating and it interrupts life cycles.
We have not tried it. Horticultural oil has worked successfully for us, and, as they say, old habits die hard.
Sooty Mold
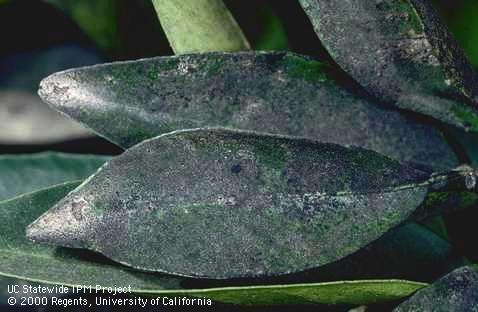
A mild case of sooty mold. UCa photo
The Gang of Eight looked as though they’d been grown in a coal mine. Now what? First the tea scale gangs, now a coal dust gang? Good thing we’d been checking on Our Gang regularly to spot warfare. But coal dust?
Looks like it, feels like it, but it’s really sooty mold—and it starts with gangs of sap-suckers: scale, aphids, mites, whiteflies.
These guzzlers suck juices from leaves above, then poop honeydew on leaves below. The sticky sap that drips on leaves is a catch basin for the next round of felons, sooty mold spores, to land and stick and grow.
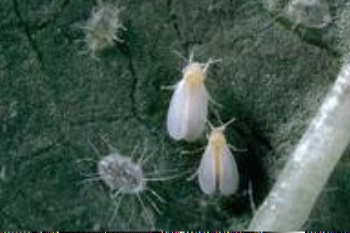
White flies, greatly enlarged, one of the sap-suckers. UCa photo
Sooty mold does not attack the leaves of a plant. The leaf merely becomes a staging area for a stubborn mat of mold fostered by honeydew.
Once blackened, coated leaves can’t capture sunlight that is needed to produce chlorophyll. When too many leaves plead disability for too long, the plant is in trouble.
Fortunately, our sooty-leaved camellias had no gangs of sap-suckers like aphids and white flies, even on tender new growth. But oh dear! That fine male American holly standing sentinel above them looked like a chimney sweep had dusted him.
C. sasanqua ‘Chansonette’, one of our originals whose home was under pine trees that are not so appealing to bug-sippers, has never suffered sooty mold. In fact, it is disease-free and its dense wide growth makes it suitable for an imposing hedge
We couldn’t see members of the sipping gangs high in the holly, but we knew they were up there raining down honeydew like bird shot on our innocent Gang of Eight.
Camellias, we discovered quickly, should not be planted around any plant susceptible to sippers that bring on sooty mold.
Native hollies are willing hosts to practically any disease or insect that comes along. Crepe myrtles also host the suckers that promote sooty mold.
We tried a blast from the hose, but the mat of micro-filaments spawned by the mold spores was tough.
We sprayed horticultural oil on the holly to dispel (kill) the sippers, which stopped the flow of honeydew. We sprayed the camellias for good measure, and the oil may have helped release the mold, for the leaves came pretty clean after a shot from the hose. Insecticidal soap is said to have the same effect.

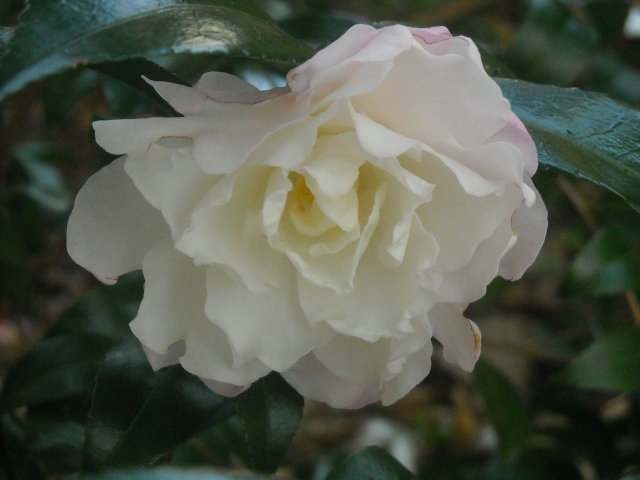
Grown from an air layer, this frilly pink japonica has been disease free
Sooty mold thrives in dry seasons; rains tend to wash it away.
In the end, some good soaking rains cleansed the leaves, and winter kept the gangs of sap-suckers down.
They did not return. Any possible problem of sooty mold would be solved permanently (if disastrously) for us a few years later. (See Camellias Become Collateral Storm Damage: Root Rot.)
Twig Dieback
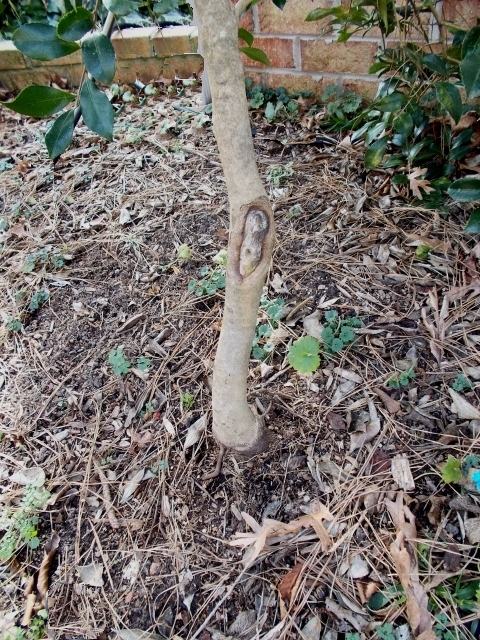
Drastic treatment: Branch cut back and part of trunk carved away to remove fungus.
Twig dieback is a particularly stealthy invader. Fortunately, we have lost only a couple of young plants to it.
Leaves turn yellow and wilt and your first impulse when you see limp leaves is to water the plant. Stop. Check your soil. If it is reasonably moist, water is the last thing the plant needs.
Pruning cuts, lawn-mower nicks, crash landings from tree-missiles may have injured the plant and gangs of spores come drifting on breezes or raindrops to enter the tiniest wounds. When affected branches are cut, they show dark stains in their pith.
Twig dieback gangs can act fast. Symptoms can spread quickly. We cut out any diseased branch or branches until the pith is completely white, no trace of murky brown but still showing green cambium under the bark to assure us it’s still alive.

Sometimes an entire plant dies back and sprouts emerge from the ground or low on the trunk. We left this ‘Lady Clare’ in place and it has resprouted. Yellowing on some of its leaves is caused by too much winter sun
For good measure we cut back another inch or so. Sometimes, despite cutting and cutting until the entire branch is gone, we still see dark signs in the joint.
Then we take drastic action as in photo above, and we hope. That plant is doing well today, though bloom is still sporadic.
I would be remiss if I didn’t tell you to sterilize your pruners with alcohol every time you make a cut. Shame on us, we don’t.
We have a large garden and limited time, so we take reasonable care and give pruners periodic cleanings.
Fungicides are often recommended for diseases caused by spores. We don’t use them. They are powerful chemicals, not to be taken lightly.
Microscopic spores in the billions are everywhere, hiding in litter, floating on breezes, spread by birds. How do you target sprays? Instead, we do the best we can. With twig dieback we clip and we hope. Occasionally, plants neither recover nor die, but fail to thrive paralyzed in limbo. It takes us a long time to take disagreeable action.
When C. japonica ‘Simeon’ was young, for the longest time we were finding dead twigs among its branches. Today it is a sturdy, healthy, 15-foot shrub that produces many successful air layers
We have found what looks like twig dieback on very young or newly planted shrubs.
I suspect much of this is natural dieback caused by shaky balance between top growth and roots. It can take time for roots to begin working efficiently after planting.
Until then, we cut out dead twigs as we spot them. We begin to worry when we see a plant shrinking instead of growing.
By the time our small plants celebrate their five-year birthdays and develop some height and bushiness, we rarely see dead twigs.
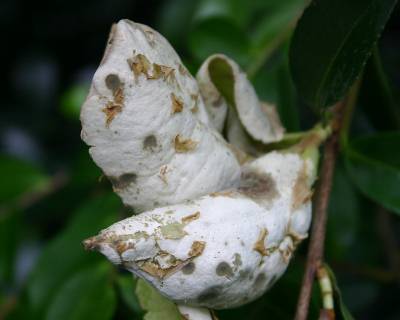
Camellia Petal Blight

Examples of flower, or petal blight in an American Camellia Society photo
Such a vexing problem. Fickle, too. It comes and goes with the weather. If spring is warm, humid and rainy, camellia petal blight can turn picture-perfect blossoms into brown rag mops. During dry years, blossoms may emerge unscathed.
Fortunately, fall bloomers don’t seem to be affected.
Here’s where it begins: millions of spores — yes, again, those pesky spores. They come neatly packaged in small hard vessels that hide in soil litter until it’s warm enough for them to escape for their spring fling.
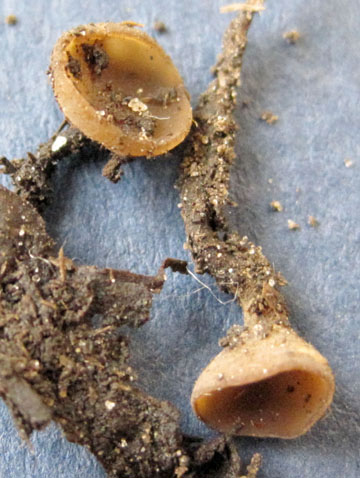
Small mushroom-like growths release spores. Internet photo. Much enlarged
Here’s how you are supposed to prevent this disease:
Collect the blooms as soon as they fall and trash them in a pail, not the compost pile.
Then rake the mulch from underneath the plants, trash that, and replace it with fresh new mulch.
In the fall, rake up the mulch you put down in the spring, trash that, and replace that with a layer of new mulch.
Got all that?
If your neighbor leaves his camellia blossoms strewn all over, well. . .
Crawling under bushes and raking up piles of mulch twice a year is not our idea of a good time in the garden. Except for occasional tidying, we always manage to be too busy to conscientiously spend time collecting fallen blossoms and their circle of mulch and then begin the process of trashing and remulching.

Yes, I admit, we’ve had some dishrags, but infestations have been mild and rare
As we’ve said before, fungicides don’t help, even though they are someimes recommended.
Good news! The disease does not show up every year! You may be plagued one year and blessed with perfect blossoms the following year.
We take our chances, and we’ve been pretty lucky so far. Or maybe it’s not just luck.
Maybe it’s simply a different approach. Each year tons of dry leaves fall from the trees on our property. Tons may be an exaggeration, though when we are raking, we are not so sure.
This natural mulch is a mix of pine needles, leaves, twigs, pine cones and seed husks and . . .
Our camellias are naturally mulched with these leaves, which, by the way, are never removed or trashed.
Late winter, before camellia blooms emerge, usually finds us raking piles of leaves from paths and outdoor verandas, oh, so many piles. . . directly onto flower beds, with an extra helping for camellias.
It’s win-win for us and our plants. The leaves are gone, the weeds are smothered, and the camellias have a hefty blanket of mulch that will eventually settle down after a few rains. In time the lower layers of leaves will decompose (quickly in our humid, hot summers) and become compost that will nourish our camellias.
Does this casual bit of mulching interfere with the life cycle of camellia petal blight? Does the mulching create a barrier for spores that would otherwise fly free. Does the compost that’s constantly created have powers to combat diseases like petal blight? Those are nature’s secrets.
Gardener’s Aside: Don’t try this with wood mulch. Wood mulch is solid and does not decompose quickly. If too much is applied annually, it will eventually build up and smother camellia roots. Camellias should have no more than 2-3 inches of mulch around their bases.
C. japonica ‘Hermes’ shows signs of a mild case of freeze damage on its top petal
Sometimes tips of petals are disfigured on blossoms. Disappointing, yes, but not a sign of petal blight.
Tightly closed buds can withstand wintry blasts, but cold snaps during bud-break will disfigure exposed tips of petals, as will strong sunshine or wind.
Fortunately, as long as some fat buds remain tightly wrapped in their overcoats during bad weather, fresh, new, perfect flowers will open on balmy days.
Camellia Leaf Gall

Leaf gall in its first flush of growth
Sasanqua camellias are generally care-free in our garden, but come early spring we have to watch out for camellia leaf gall on these fall/winter bloomers.
It’s infrequent, but during cool damp springs new growth of camellias and azaleas can emerge thick and fleshy and bright green.
This showy growth can be attractive, and it seems like something special. What causes it? Spores in the millions hiding in soil until spring breezes blow in.
Give the galls time and they become unsightly with powdery white spores that fly about when disturbed
Consider the neon-green leaves your beacon for action. Remove them immediately. Pluck them by hand or prune their stems.
Immediately drop them in a plastic bag and put them in a trash can.
If you delay, the leaves become dry and powdery and new spores will fly from them to lie in wait until the next cool, damp spring stirs them to action.
This gall is more annoying than harmful to camellias and it takes very little time to control by hand.
We have several sasanquas ‘Cleopatra,’ usually carefree with a simple bloom.
Only once did it cause a calamity when a four-foot ‘Cleopatra’ had so many galls it could have been a chartreuse-neon Christmas tree.
If I had plucked all infected leaves, it would have looked like a porcupine.
Instead I cut it to the ground, a drastic — but fast measure — and one that camellias survive well.
Since its root system had not been disturbed, it grew back quickly. It has been gall-free since.
Root Rot
This became a serious problem for us when drainage in our garden changed from barely okay to positively poor. For a discussion of root rot, see Camellias Become Collateral Storm Damage: Root Rot.
Other Pests: Voles and Deer
They are neither insect nor disease, but certainly these two mammals can deliver a one-two punch to camellias: voles by chomping roots,and deer by chomping leaves. You can read more about them in Wildlife and Camellias.
Last Words
All this talk about disease makes it sounds like camellias are always in sick bay. And they’re supposed to be carefree? Truly?
Okay okay, cut me some slack here. Have we had to deal with insects, diseases, losses in a large garden? Yes. That’s why we know so much about them. But, think about it, the only artilllery we recommend against these assassins is horticultural oil and good mulch, so you needn’t clutter your sheds with chemicals.
In thirty years of gardening on North Carolina’s coastal plain, the time spent caring for our camellias, now almost a hundred of them, has amounted to three or four days a year. The pictures of our favorite camellias you see here prove our point.

One of our favorites, C. sasanqua ‘Hana Jiman’
The dividends in enjoyment and beauty have been vast. When the garden is brown in winter, the deep green leaves of camellias reflect brilliant sunlight. When the garden is wilted in summer, camellias stand tall and smile.
That said, tea scale will always be lurking.
Camellias in our Garden Siting and Planting Camellias
Pruning and Fertilizing Camellias Insects and Diseases of Camellias
Camellias Become Collateral Storm Damage Camellia Recovery and Care
Air Layering Camellias Wildlife and Camellias
Choosing Camellias Landscaping with Camellias Companions for Camellias

What a jolly post! Thank you for keeping me reading with interest.
Glad you enjoyed the post. I hope your camellias will forever be free of insects and diseases!
Thank you, and thank you for this written piece. I have never gotten such a thorough, understandable and personal explanation of what it is, what it looks like, what to look for / what to ignore, and what to do for it – mostly naturally – anywhere else. My gratitude for all this wealth of information. I thank you (again) and my Camellias thank you (via me). 👍🏼 Victoria
I am so glad you found this piece helpful, and thank you for taking the time to tell me so. The piece is he result of years of experience growing camellias in our garden. Please don’t hesitate to send any specific comments or questions, as we are always ready to “talk” camellias and learn something new.
Thank you for WONDERFUL SITE . i AM STILL, PUZZLED AS TO WHAT IS WRONG WITH MY ‘THRIVING’Thank you CAMELIA TREE/ BUSH . SEVERAL LEAVES ARE COVERED WITH A FINE BRIGHT GREEN POWDERY COATING LIKE A VERY FINE MOSS would be grateful for any help or ideas as it is a wonderful specimen which I’d like to keep !
I am puzzled also. It would seem like a fungus but I have not seen anything like what you are describing. Can you pinch off all the coated leaves? If too many, try just one area of the bush and see if anything comes back. Bag affected leaves and put in the trash.I would suggest you try removing it with a sharp spray of water EXCEPT that if it is a fungus you could be spreading spores. I am contacting some other gardeners. Also, can you bring a sample to a cooperative extension office. If they don’t know they might send it off to the university. Please let me know. Good luck
I have 3 wonderful camelias on my balcony. Each spring as the new growth emerges the leaves are attacked with clusters of tiny black insects , even before the leaves unfurl. What product should I use to rid them?
The tiny black insects could be aphids. You can try spraying insecticidal soap but the insects need to be directly sprayed in order for the soap to be effective. Residue of insecticidaL soap does not kill insects, so repeat applications may be necessary.
Very well written, factual and entertaining. Thank you for your help with my camellias. Brenda